So I haven’t done a tutorial in quite some time now so I figured it was about time ! If you’ve reading my blog lately you know that I’ve been showing a lot of glitter placement with my swatches. Glitter placement it’s a really fun and easy way to jazz-up any manicure while at the same time adding glitter to your nails, and come on who doesn’t love glitter ?!
So there’s a couple ways to do it, you can use dry loose glitter and place it on your nails into wet polish. I’m not really a fan of this option just because you have to keep reapplying topcoat, to keep your polish tacky so the glitter actually sticks to it….That can get messy .
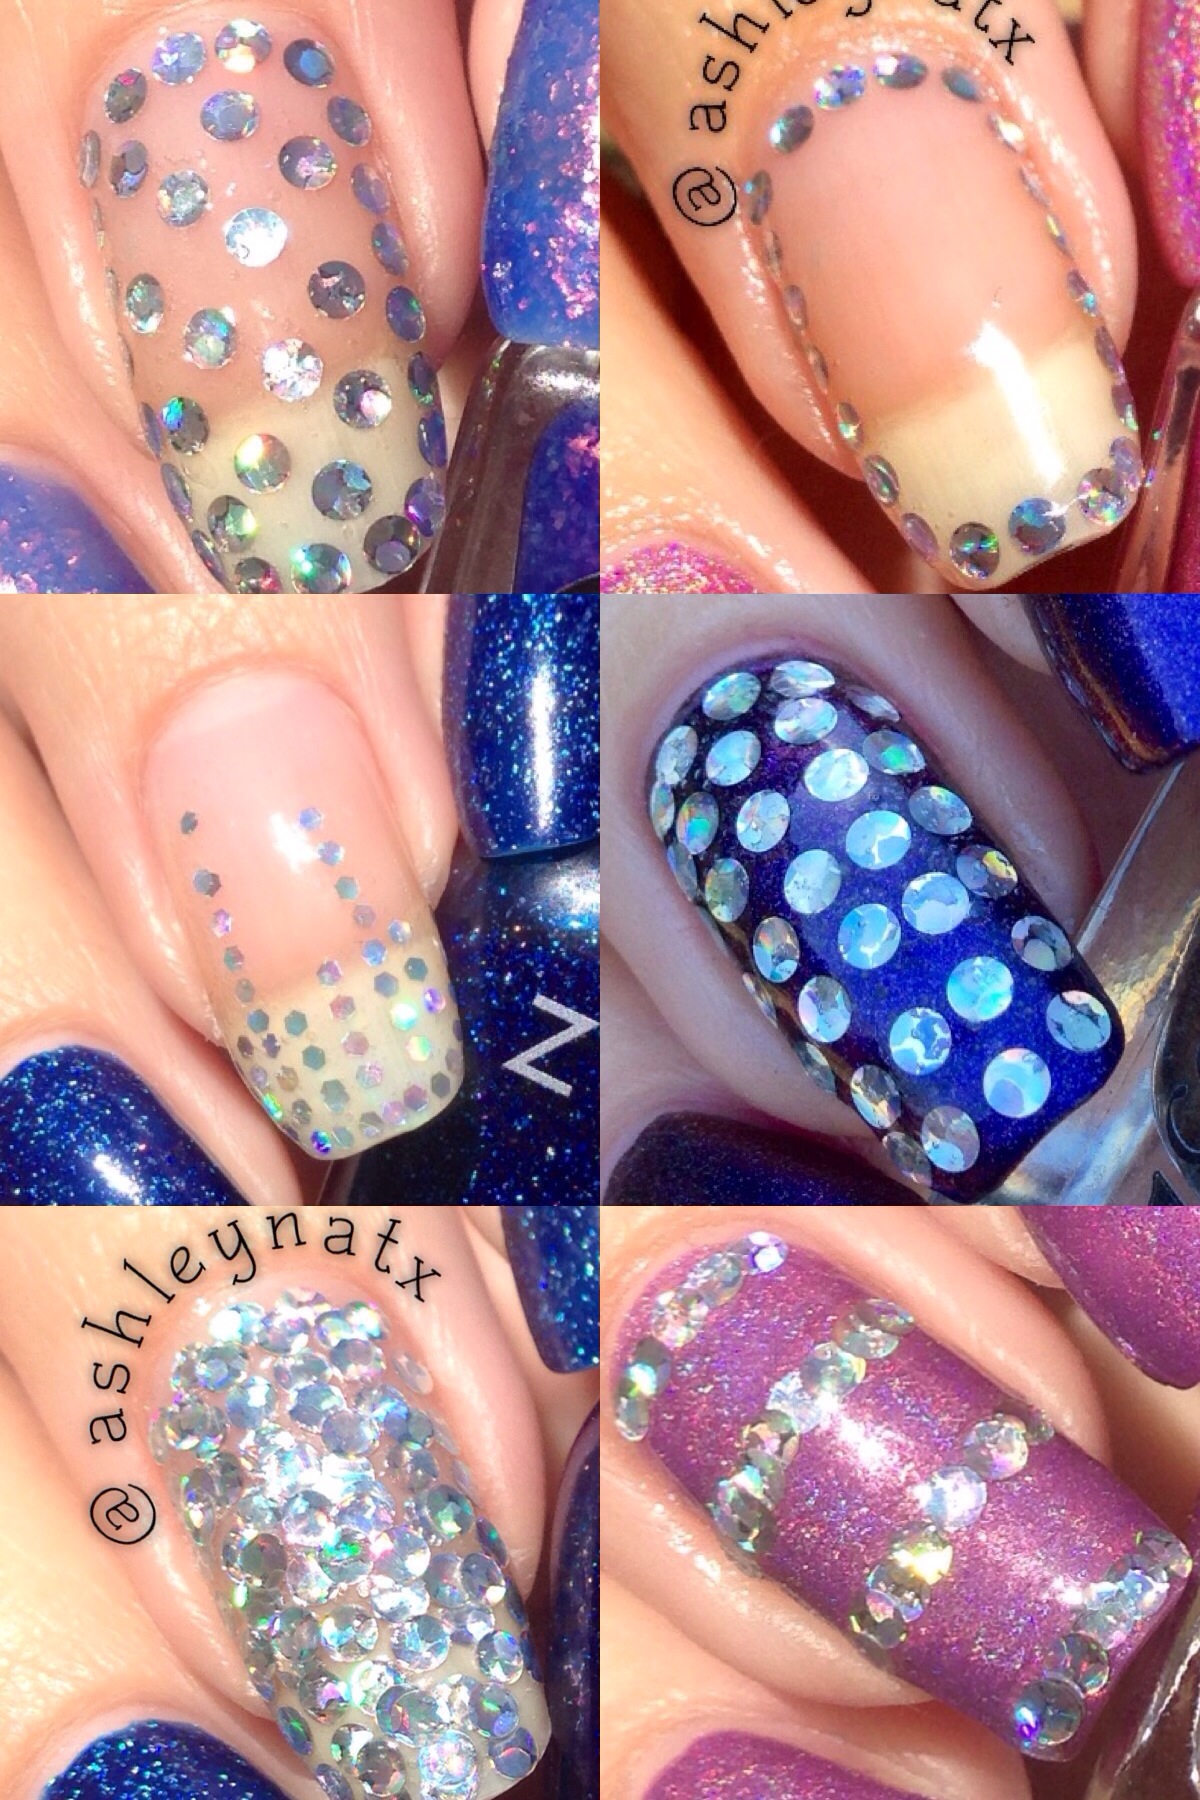
I prefer fishing out glitter from a pre-existing glitter polish and placing it on the nails. The polishes clear base acts as an adhesive. Therefore you don’t have to keep reapplying topcoat 🙂
A really good option is OPI’s I Snow You Love Me . I am very fond of this polish I even have a back-up bottle! The glitter is the perfect size and super easy to work with.
 All you have to do is dab some of the polish into the center of a nail wheel, next pick up the glitter with a dotting tool or if you don’t have one a tooth pick works too, and place the glitter on your nails! It can be done on your bare nail or over polish.
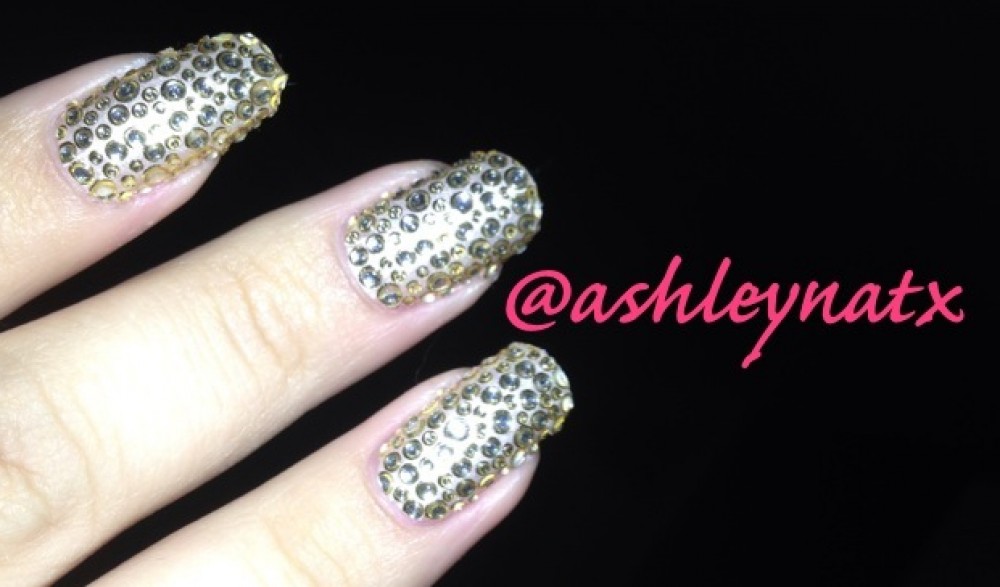
 The only thing left to do is let your imagination run wild! You can use this technique as an accent nail or do a whole manicure covered in placed glitter. Remember always use a high-quality, thick-ish topcoat to finish off your look!
If you guys liked this and want more let me know 🙂
Thanks for reading ❤
And be sure and follow me on Instagram
